There are so many reasons to create bespoke printed photo books. Perhaps you need a gift to mark a milestone birthday or to commemorate a wedding day. Maybe you simply want to keep your kids’ preschool snaps in one place for posterity. There is something wonderfully permanent about having your images collected, enlarged and beautifully printed onto pages – and it’s so much better than scrolling through an unedited stream of random images on your phone screen. Here’s how to make a photo book to treasure forever.
Getting Started Making Photo Books
There are a huge range of sizes of Officeworks photo books on offer, so think carefully about which one would best suit your project. Is it going to sit on a bookshelf or lay on a coffee table? Hardback photo books are suitable for most projects due to their durability – they can be passed around at a party and won’t be damaged. But soft-cover photo books are suitable for more personal publications, such as a school project. Other options to consider are whether you would like it bound in a leather-look material or packaged in a presentation box. Decisions, decisions! And you haven’t even selected a single image yet.
Selecting and Loading Images For Photo Books

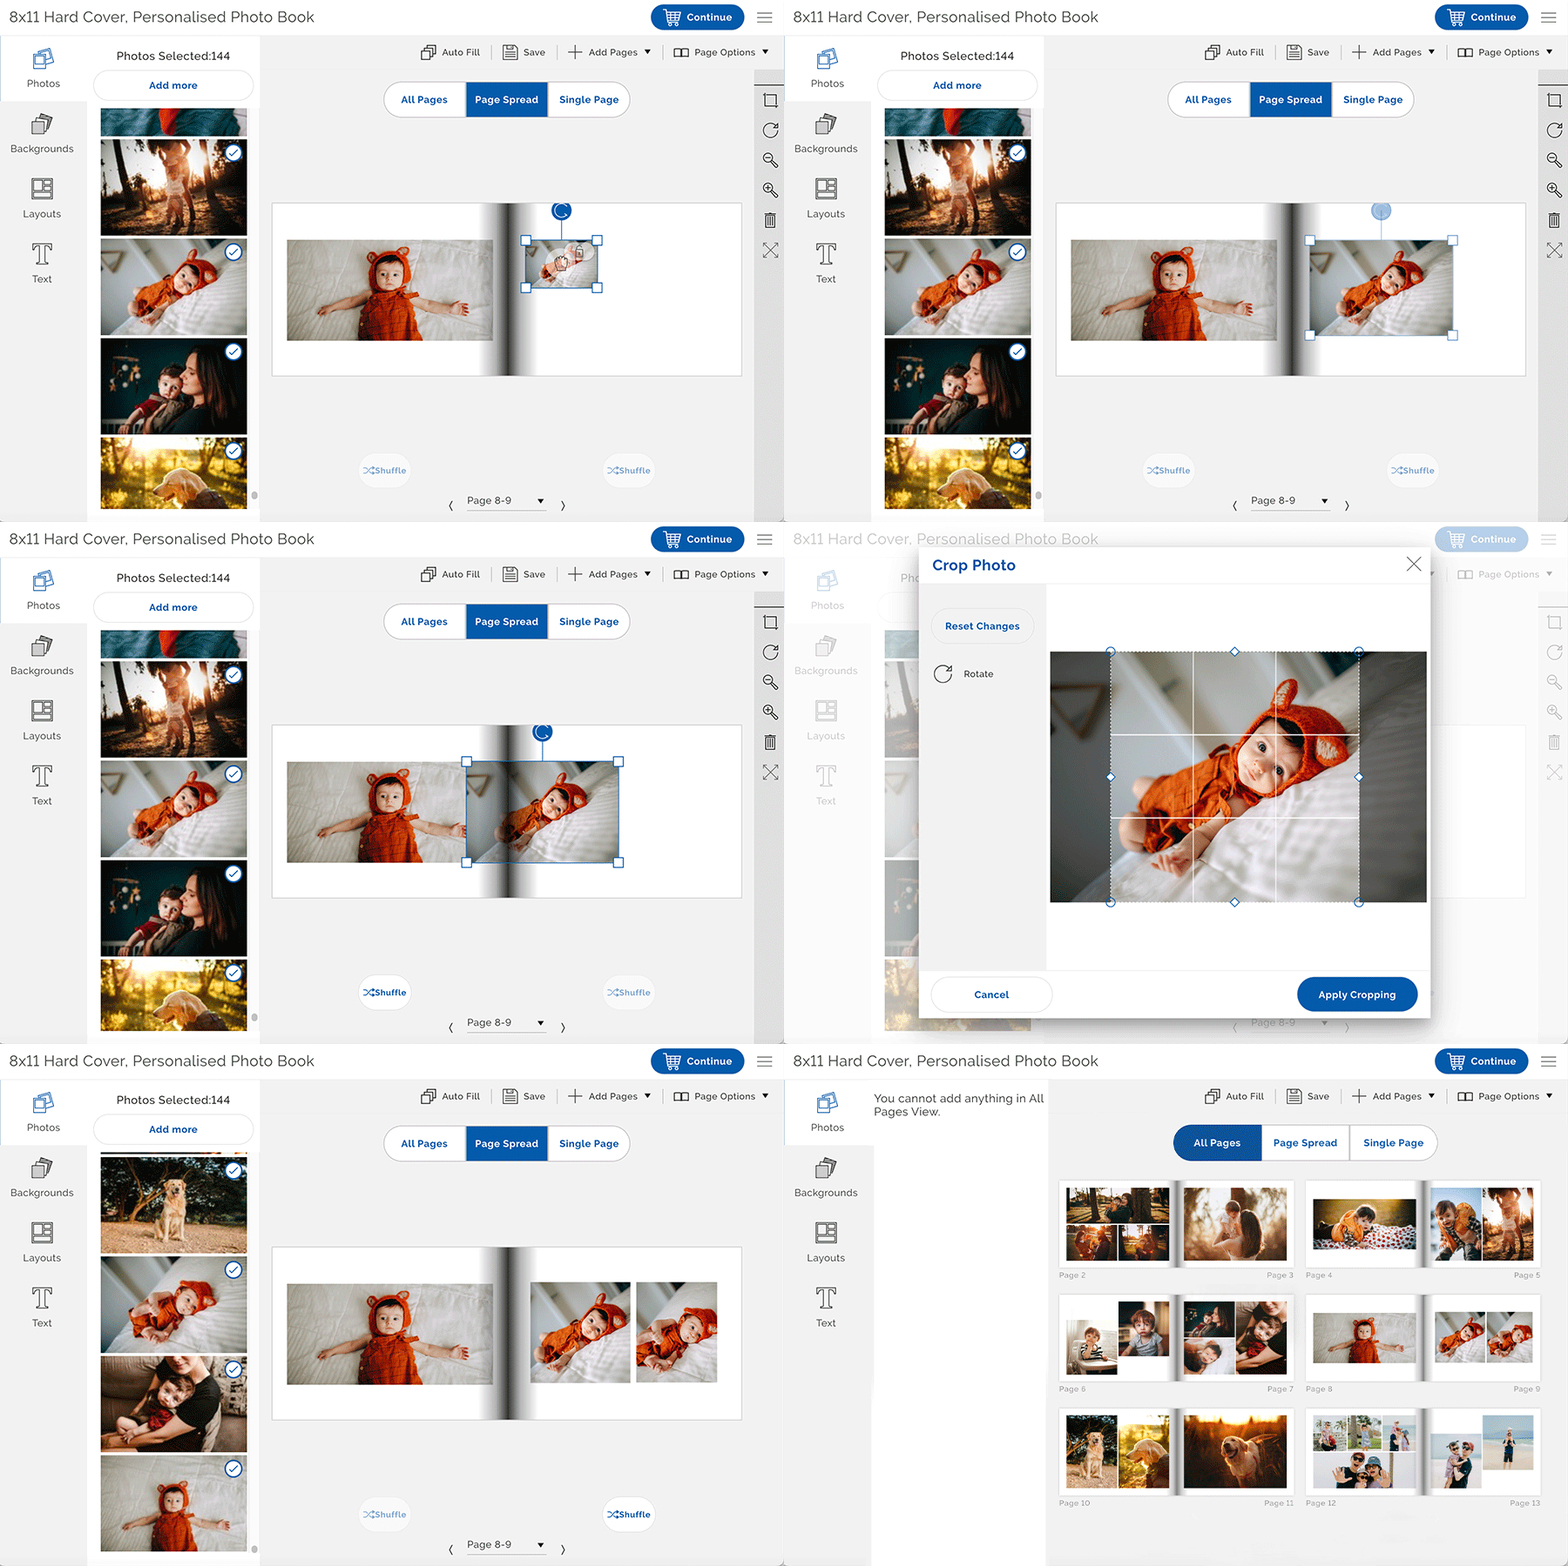
When selecting your digital photographs, we suggest creating a shortlist (even if it’s more of a longlist!). These images will appear in a sidebar on the left within the Officeworks photo books app that appears once you’ve selected the photo book you want to create.
From there, you’ll be able to drag your images onto the page layouts. It doesn’t matter if you decide not to use every shot; some might even be so good you use more than once – perhaps on the cover, as well as on the pages of the photo book. Once you have used an image in your photo book, a tick will appear on the thumbnail in your library. If you’ve used it twice, it’ll get two ticks. All of which makes it very easy to keep track of which images you have already placed on your pages.
Choosing Layouts for Photo Books

When designing photo books, think about which images would benefit from having a page to themselves. Usually, these would be photographs with a lot of detail or images so awesome you want no distractions placed next to them.
In other cases, three or four images together on a page can be very effective. Show multiple shots from a sequence or photographs of different elements from a single event, for example, the food from a wedding.
SEE ALSO: 5 Photo Wall Ideas to Decorate Your Home
When to Use Full-page Images in Photo Books

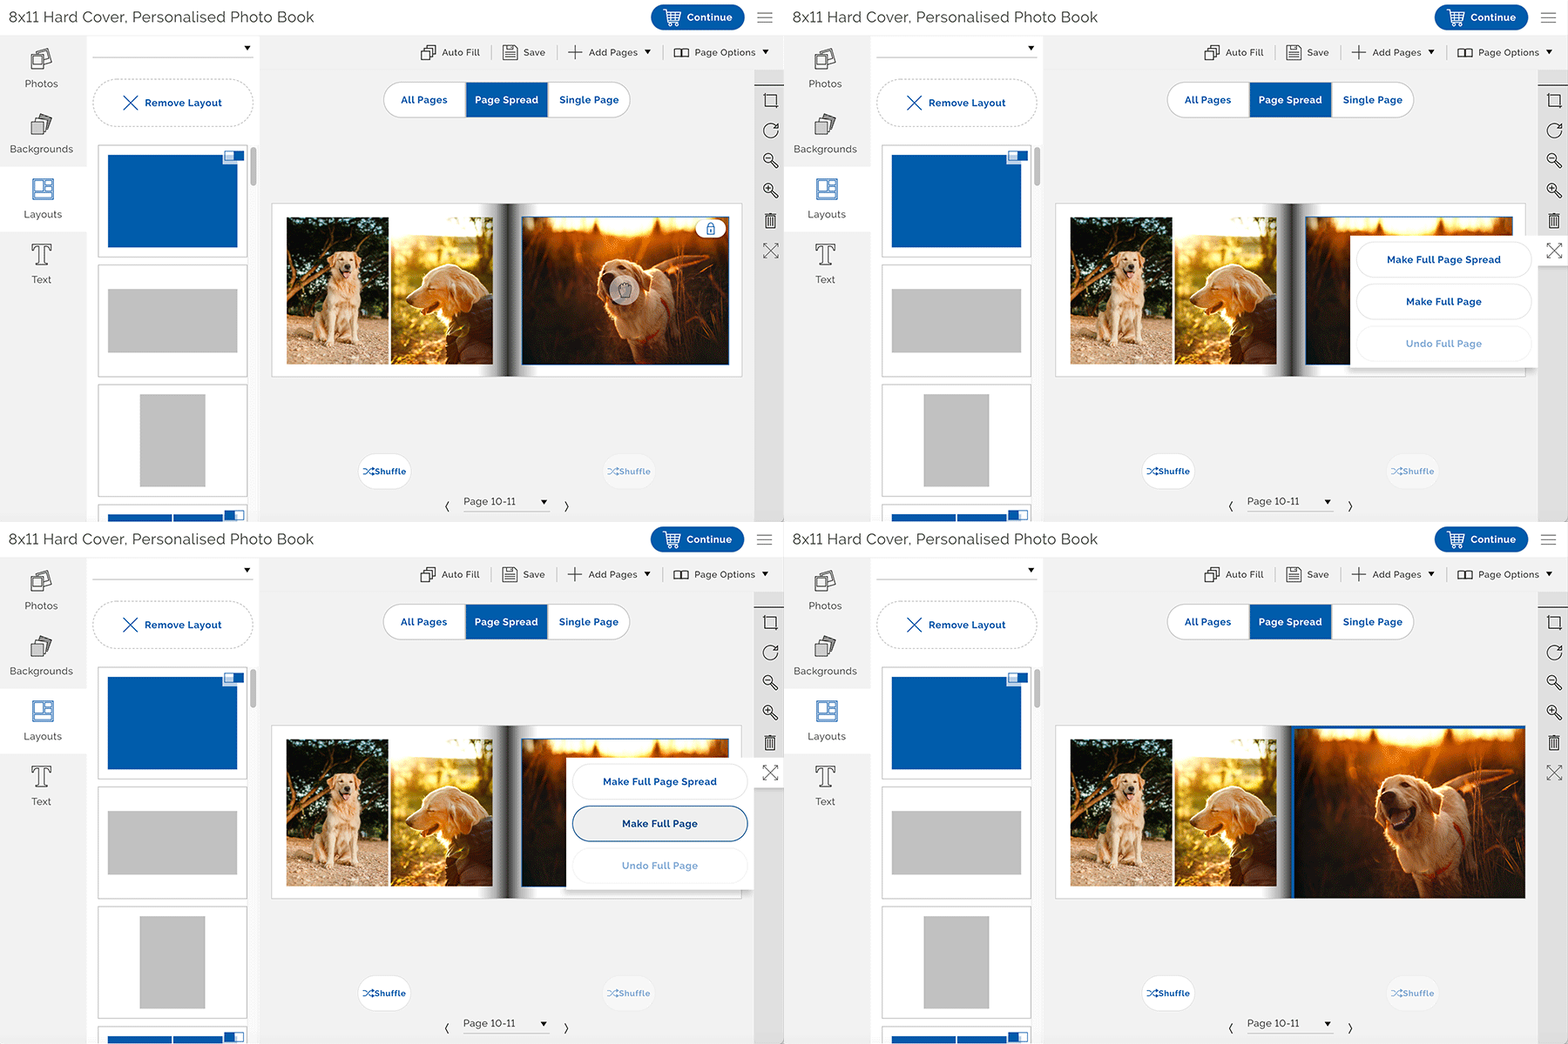
If you have images for your photo book that simply can’t be too big – like the one of the beautiful golden retriever above – then you have the option to make the image a full page or even a full-page spread, which means it stretches across both pages – perfect for those holiday panoramas. When you choose either of these two options the image will go to the very edge of the page, with no white paper visible.
This will give your book a very professional feel, while also maximising the size of the pictures. It’s best not to do this on every page, though, as the white frame provides a certain continuity for the reader that is lost in a book that only has full-page images. Variety is key when designing layouts for photo books.
Cropping Images for Your Photo Books

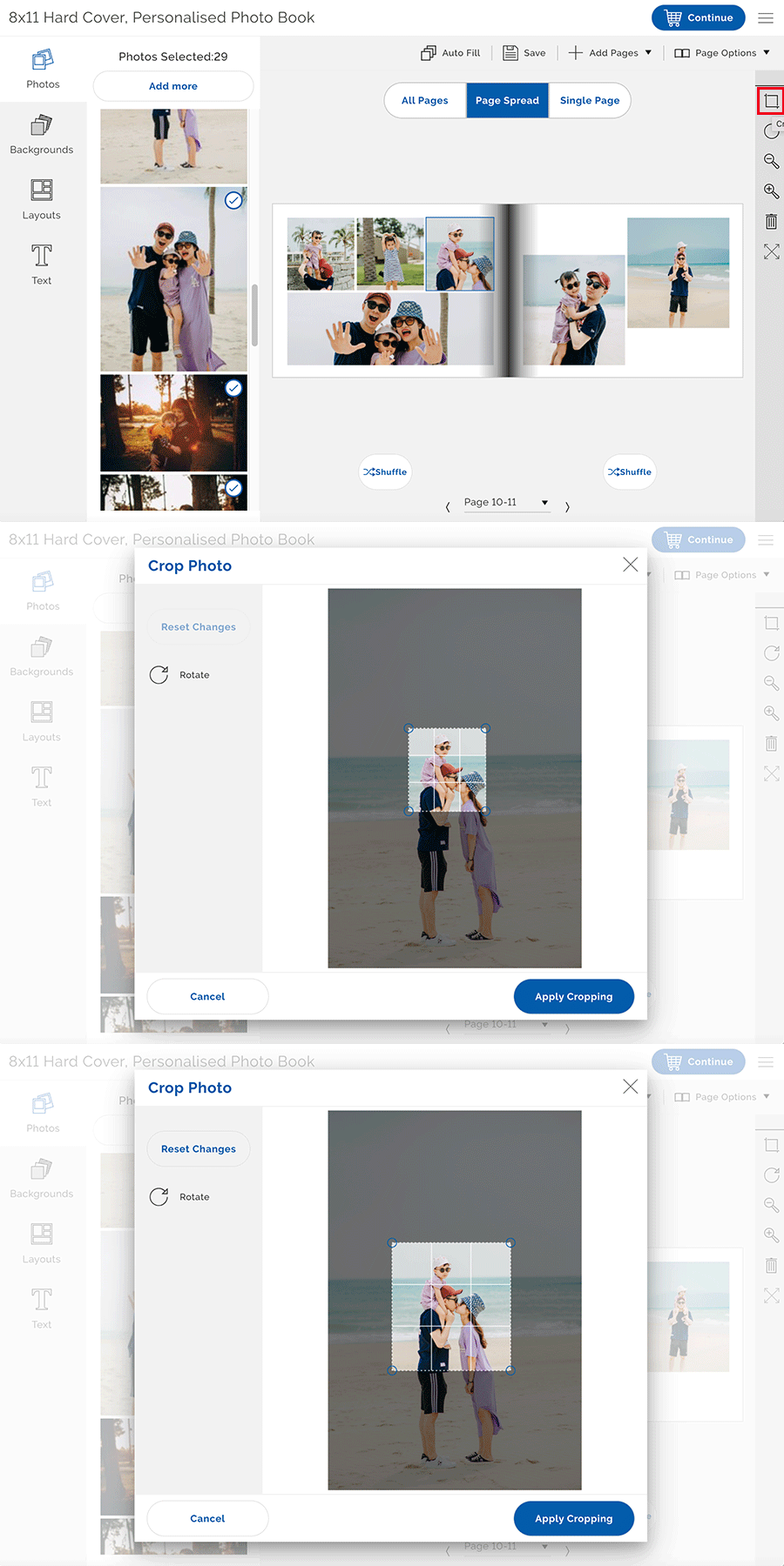
Don’t feel restricted by the shape of a photo or the fact that you love it but there’s too much sky or sand. When you’re creating photo books online, you can simply zoom in on the precise part of an image that you love with the cropping tool and apply your changes.
Creating Eye-catching Covers for Photo Books

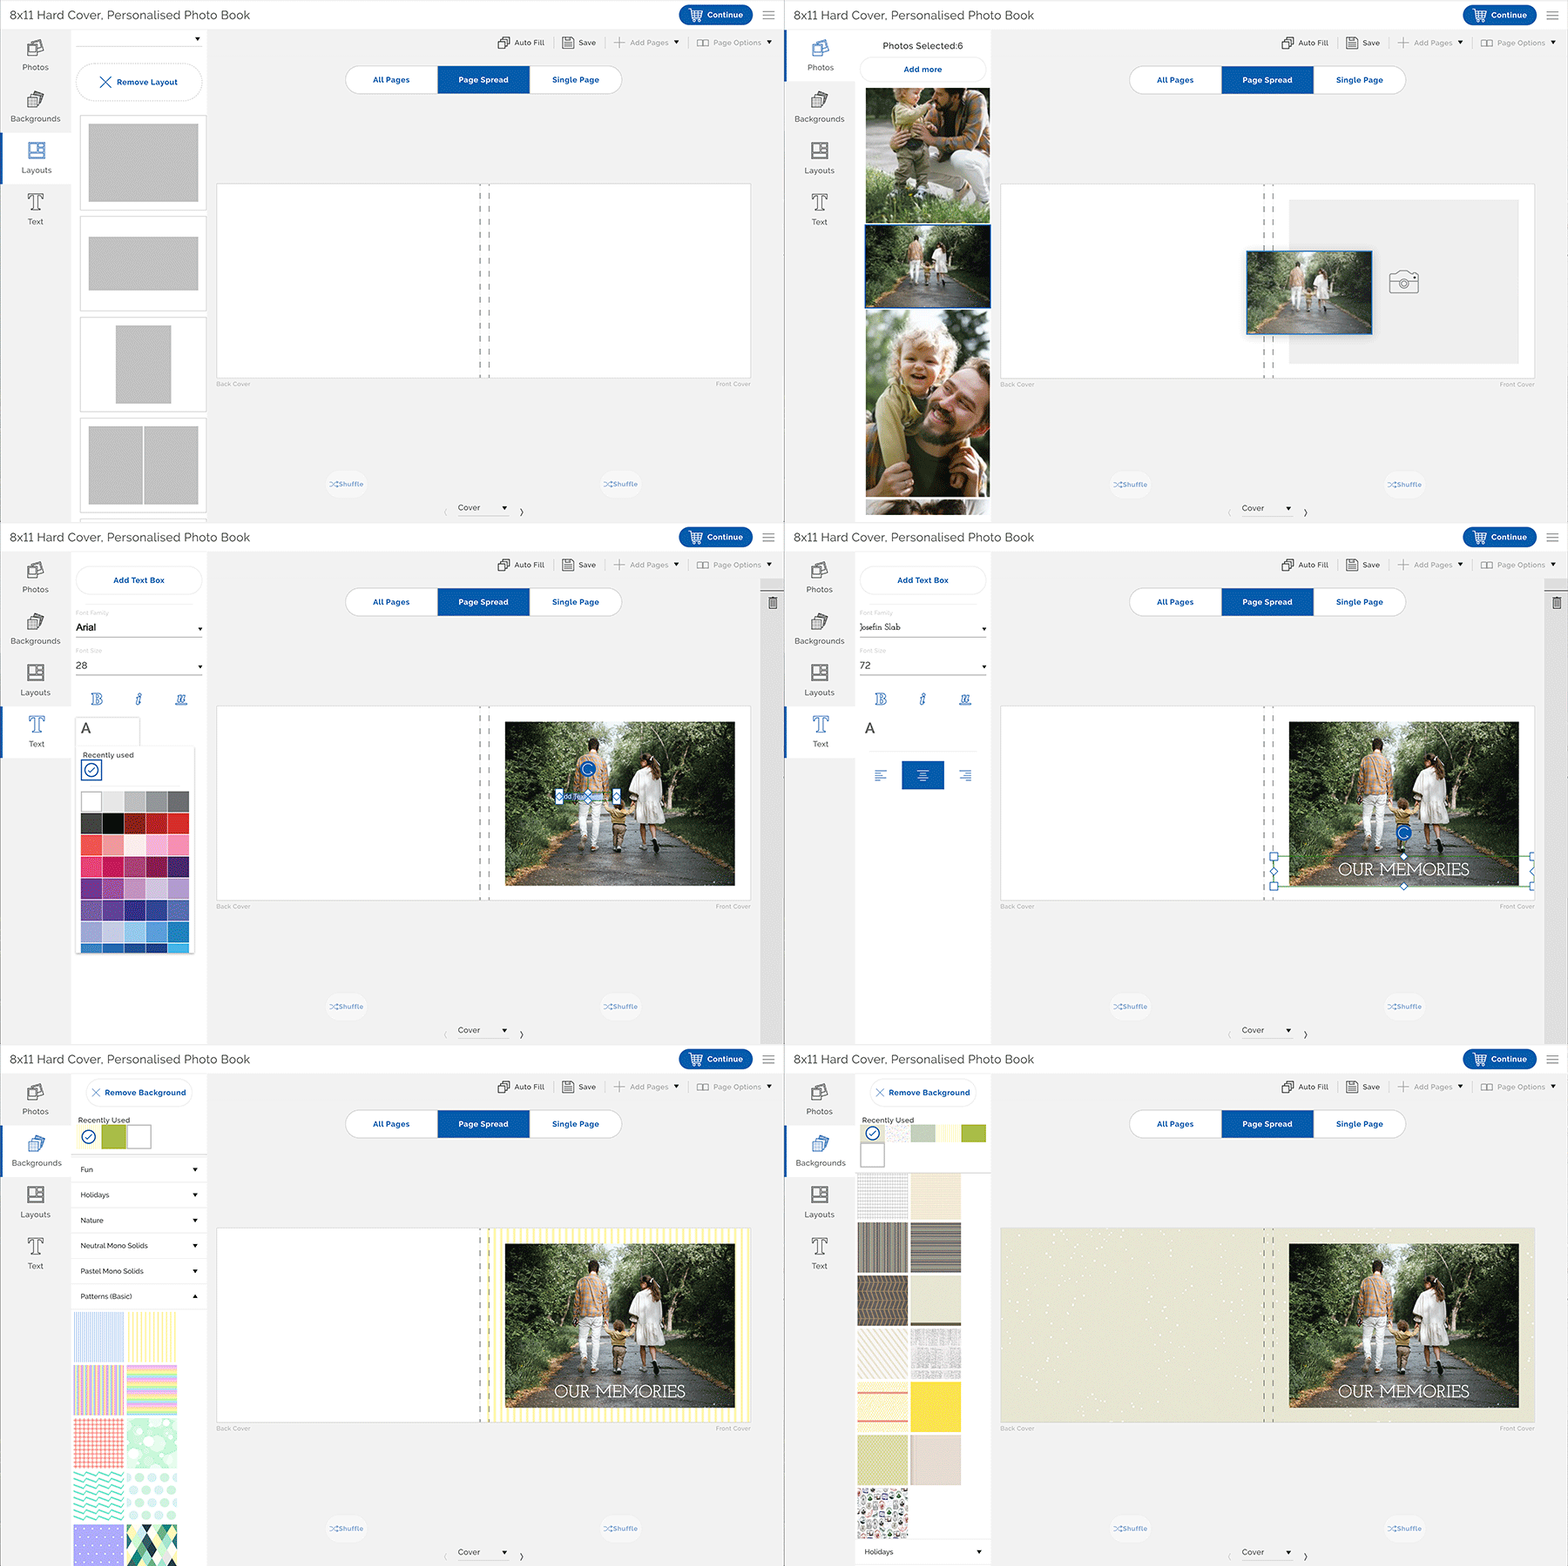
When designing covers for photo books, pick an image that isn’t too specific and perhaps conjures a mood rather than a specific event – this is the style a lot of professional book publishers go for. Alternatively, you could pick an image that makes you laugh every time you see it. That’s the beauty of designing your own photo book – there are no rules.
Then it’s just a question of adding and positioning a title and perhaps a border to the cover and you’ve created a photo book your family and friends will treasure.
Once you’ve completed preparing your photo book online using the Officeworks photo books app, allow 7-10 business days for it to be printed, whether you decide to have it delivered or if you prefer to collect it from your nearest Officeworks store.
SEE ALSO: Best Tech Gifts for Mother’s Day
What To Try
- 8 X 11" Personalised Hard Cover Book
- 8x11" Personalised Soft Cover Book (40 Pages)
- 12 X 12" Leather Look Padded Hard Cover Book
- 12 X 16" Leather Look Padded Hard Cover Book In Presentation Box
- 6 X 6" Personalised Soft Cover Book (60 Pages)
- 6 X 8" Personalised Soft Cover Book (22 Pages)
- 8 X 8" Personalised Hard Cover Book
- 8 X 8" Personalised Soft Cover Book (60 Pages)
- 8x8" Premium Personalised Hard Cover Book
- A4 Personalised Hard Cover Book
- A4 Personalised Soft Cover Book (60 Pages)


